Updated August 8, 2019
StudyGate provides a video chat and learning canvas for students for use during Online Tutoring sessions. Here is a demo to see how it works.
The learning canvas has three main functions
Whiteboard
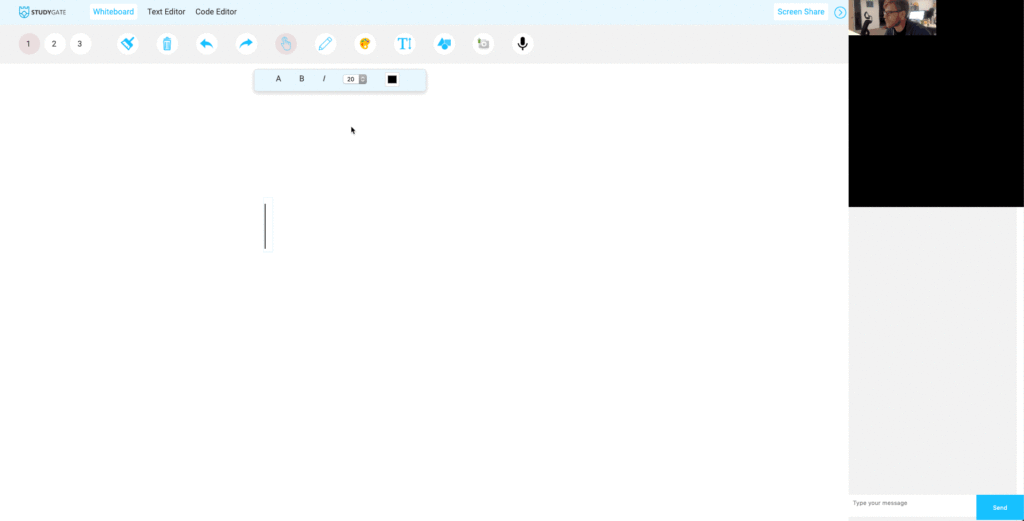
When you open the whiteboard, you will see a blank white screen with several icons at the top. Each one is pretty self-explanatory, but keep reading if you want the nitty-gritty..
- To draw something, click on the pencil icon and use your mouse to draw on the whiteboard.
- To switch colors, click on the painter’s palette icon.
- To add text, click the T icon.
- To add a basic shape, click on the shapes icon.
- To delete an object that you placed on the screen, click the trash icon.
- To select an object that you placed on the screen, click the finger icon.
- To undo your most recent action, click the arrow pointing left icon.
- To redo your most recent action, click the arrow pointing right icon.
- To erase the entire whiteboard, click the broom icon.
- To mute your audio feed, click the microphone icon.
If you need more room, there are two additional whiteboards available. To access them, click on the 2 or 3 at the top of the screen.
To go back to the first whiteboard, click on the 1 at the top of the screen.
Text Editor
Text Editor is useful for writing longer messages and editing documents. Again, this is pretty self-explanatory. But if you’ve never used something like Google Docs before, keep reading.
- To change the font size, type, or color, use the drop-down menus at the top of the page.
- To make text bold, click the B icon.
- To italicize text, click the I icon.
- To underline text, click the U icon.
- To cross out text, click the S (strikethrough) icon.
- To create a list, click on one of the list icons. The icon on the left is for bulleted lists, the icon in the middle is for numbered lists, and the icon on the right is for creating a list with checkboxes.
- To tab to the right of the screen, press the right tab icon.
- To tab to the left of the screen, press the left tab icon.
- To change the alignment of your text, use the text-alignment icons. The icon on the left aligns text with the left margin, the icon in the middle is for centering text, and the icon on the right aligns text with the right margin.
- To undo your previous action, click the left-arrow icon.
- To redo your previous action, click the right-arrow icon.
- To insert an image, click the image icon and paste the URL into the text box. Press Submit when you are done entering the URL. To insert an image from your desktop, turn it into a link with a free service like WeTransfer.
Code Editor
Code Editor is ideal for helping students with coding assignments.
When you open Code Editor, choose JavaScript or PHP by clicking the drop-down menu under Language.
To change themes, click the drop-down menu next to Theme.
Two important features you shouldn’t overlook
Screen Sharing
To share your screen with a student, click Screen Share at the top right corner of the whiteboard. You may be prompted to install the StudyGate screen-sharing extension.
Chat Function
To chat with a student, type a message in the text field on the bottom right corner of the screen. If you cannot see the text field, click the blue chat bubble next at the bottom right corner of the screen.

